Interactive TUI
Your apps are now interactive
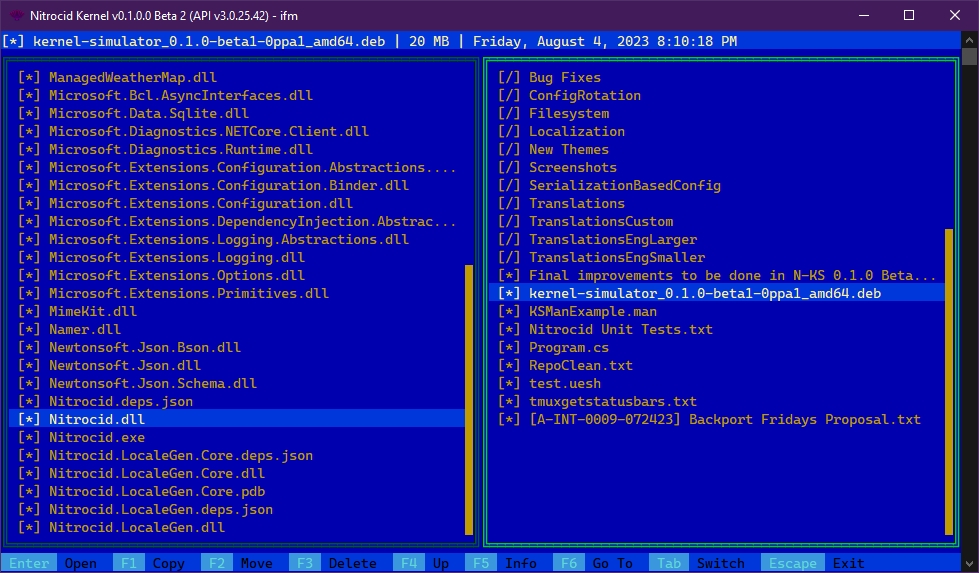
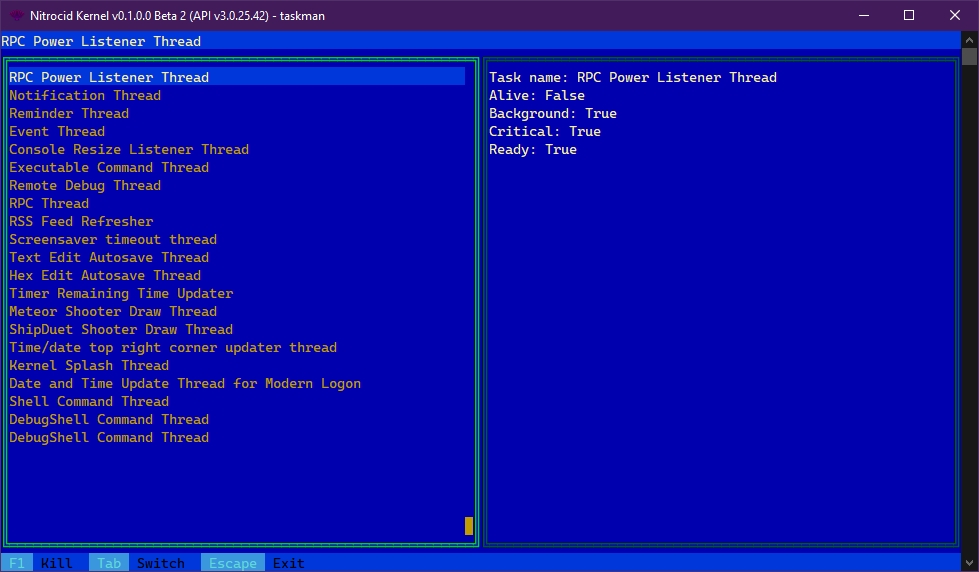
The interactive TUI allows you to make your apps interactive if they provide one or two data sources, which consist of a list of strings, integers, and even class instances, to make getting information about them easier. The interactive TUI renders the screen in two panes, the top being a status bar, and the bottom being a list of key bindings. For clarification, the ifm command uses the double pane interactive TUI and the taskman command uses the single pane interactive TUI with info in the second pane:
Can I make one, too?
Yes! You can make your own interactive TUI application. Depending on your requirements, you may want to make a plan as to how would your interactive TUI application be.
For each application, you must make a class that would implement both the BaseInteractiveTui class and the IInteractiveTui interface, just like below:
internal class MyTui : BaseInteractiveTui<string>, IInteractiveTui<string>
{
    public override InteractiveTuiBinding[] Bindings { get; } =
    [
        new InteractiveTuiBinding("Action", ConsoleKey.F1, (data, _) => Proceed(data))
    ];

    public override IEnumerable<string> PrimaryDataSource =>
        new string[] { "One", "Two", "Three", "Four" };

    public override string GetStatusFromItem(string item) =>
        item;

    public override string GetEntryFromItem(string item)
    {
        return $" [{item}]";
    }

    private static void Proceed(object data)
    {
        string currentItem = (string)data;
        InfoBoxColor.WriteInfoBox(currentItem);
        InteractiveTuiStatus.RedrawRequired = true;
    }
}
However, you cannot execute your interactive TUI based on your class unless you use this (assuming that you've already defined a command entry in your mod entry point class called mycommand):
public override void Execute(string StringArgs, string[] ListArgsOnly, string[] ListSwitchesOnly) =>
    InteractiveTuiTools.OpenInteractiveTui(new MyTui());
If everything goes well, you should see this:
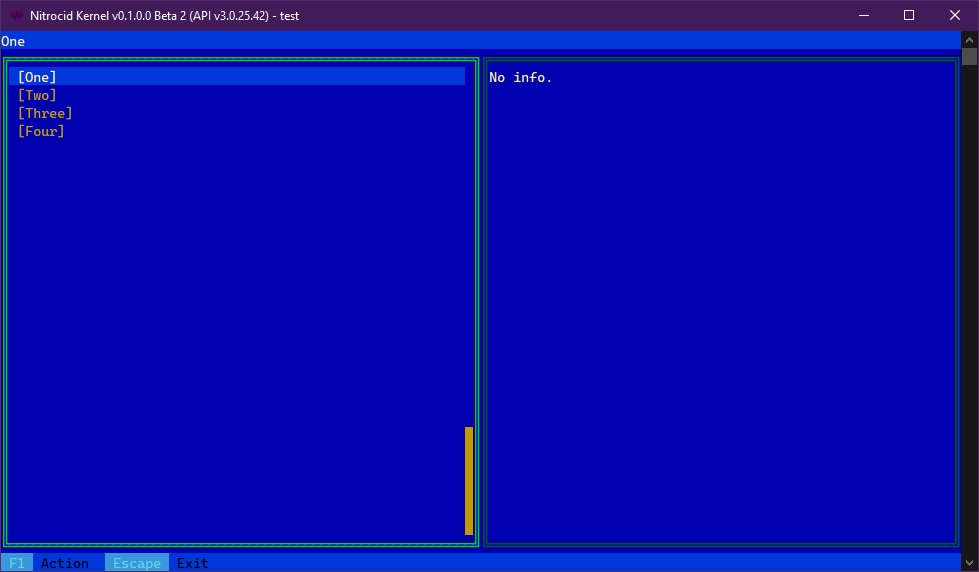
And if you press your key binding, you'll get this:

For multiple panes, you'll have to modify your class to take two data sources and adapt it to interact with the second pane, like below: (note the highlighted parts, they are added)
internal class MyTui : BaseInteractiveTui<string>, IInteractiveTui<string>
{
public override InteractiveTuiBinding[] Bindings { get; } =
[
new InteractiveTuiBinding("Action", ConsoleKey.F1, (data, _) => Proceed(data)),
];
public override bool SecondPaneInteractable =>
true;
public override IEnumerable<string> PrimaryDataSource =>
new string[] { "One", "Two", "Three", "Four" };
public override IEnumerable<string> SecondaryDataSource =>
new string[] { "Five", "Six", "Seven", "Eight", "Nine", "Ten" };
public override string GetStatusFromItem(string item) =>
item;
public override string GetEntryFromItem(string item)
{
return $" [{item}]";
}
private static void Proceed(object data)
{
string currentItem = (string)data;
InfoBoxColor.WriteInfoBox(currentItem);
InteractiveTuiStatus.RedrawRequired = true;
}
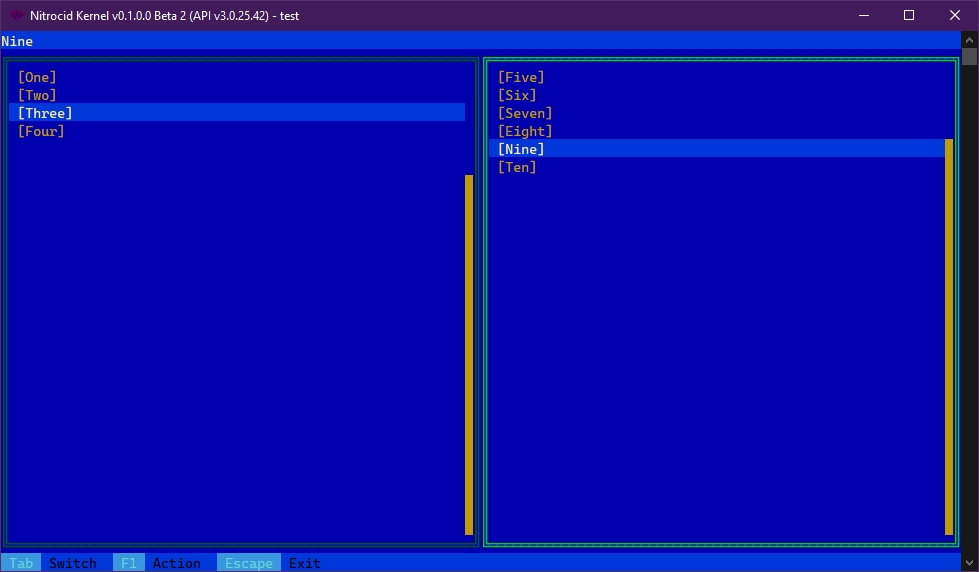
}If everything goes well, you should be able to switch to the second pane, causing you to be able to select items from the second pane:
And if you try to execute your key binding on an item found in the second pane, you'll see this:

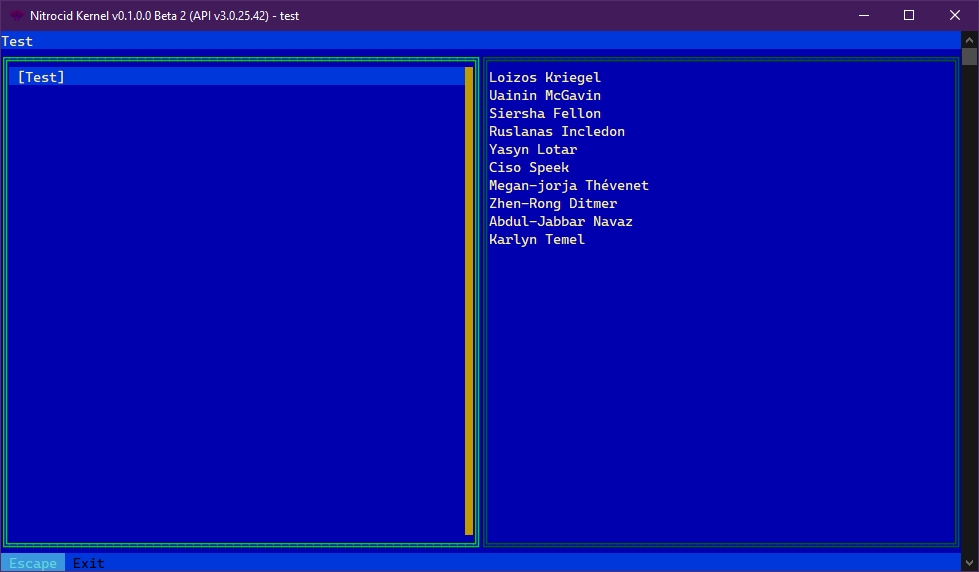
Additionally, you can make your TUI app refresh every set millisecond so that your app can update itself based on the selected data, like weather for the selected city. For this, you need an information source that is dynamic and self-updating (from the GetInfoFromItem() function), like stopwatches, random data, or even self-updating data gathered from the Internet, based on the selected item in the first pane, assuming that you know how to process them correctly.
For example, to use the Textify library to make a single-paned TUI application that gathers random names to list 10 names in the info pane, you must add a NuGet package, Textify, to your mod's dependencies. To learn more about how to use this library, consult the below page:
How to useHow do I use this library?The code that would do this would look like this:
internal class MyTui : BaseInteractiveTui<string>, IInteractiveTui<string>
{
    public override InteractiveTuiBinding[] Bindings { get; } = [];

    public override int RefreshInterval => 15000;

    public override IEnumerable<string> PrimaryDataSource =>
        new string[] { "Test" };

    public override string GetStatusFromItem(string item) =>
        item;

    public override string GetEntryFromItem(string item)
    {
        return $" [{item}]";
    }
    public override string GetInfoFromItem(string item)
    {
        var namesBuilder = new StringBuilder();

        var list = NameGenerator.GenerateNames(10);
        for (int i = 0; i < list.Count; i++)
        {
            string name = list[i];
            namesBuilder.AppendLine(name);
        }

        return namesBuilder.ToString();
    }
}
If everything goes well, you should see your TUI app refresh every 15 seconds:
Bindings can also be configured to be executable even if there are no items in either the first pane or the second pane. However, you'll need to pass true to the last argument of the constructor of your binding instance, which controls this setting. Currently, it's set to false, meaning that this binding is not executable until there is at least one item.
Colors for the TUI
You can also specify the colors for your TUI application, too! Currently, your interactive TUI uses the regular colors defined under InteractiveTuiStatus.
AcceptsEmptyData
AcceptsEmptyDataYou can specify if your interactive TUI accepts empty data. The interactive TUI, by default, checks for the data source in both panes and, if not found or are empty, exits.
However, if you override the value like below, it'll start up regardless of how many data is there.
public override bool AcceptsEmptyData => true;Screen
ScreenYou can also access the Screen instance that the interactive TUI uses by accessing the Screen property in order to be able to get a deep insight about what the screen contains, including buffer data for rendering selected elements.
public Screen ScreenInstance
InstanceSome of the interactive TUI tools require that you provide the base interactive TUI instance. Inside your interactive TUI class, you can use this property to get the current interactive TUI instance that is currently on display. The below example shows the SelectionMovement() function being called with this property:
InteractiveTuiTools.SelectionMovement(Instance, 1);